Tutorial
This tutorial will go over:
- How to setup a test automation project.
- Adding the WPF Pilot package via NuGet.
- Writing a comprehensive automation test.
At the end we will have a working automation test.
This tutorial uses the PaymentCalculator repo, which is a real world application.
Start by cloning the project.
git clone https://github.com/WPF-Pilot/PaymentCalculator.git
Next, open it using Visual Studio. This tutorial used Visual Studio 2022, older or newer versions of VS may require tweaks.
In the Solution Explorer we see there is already a tests folder with a PaymentCalculator.Test project. Opening a test file, we see the project is using Xunit. Lets stick to using Xunit for consistency.
However, the tests in PaymentCalculator.Test are unit tests so we'll create a new project for UI tests.
Right click the tests folder in the Solution Explorer and click Add > New Project. In the project setup wizard, if we search for "xUnit" we see "xUnit Test Project" as a C# option.
Select it. Let's name the project PaymentCalculator.UITest and change the output path to be in the tests folder.
For the framework we chose .NET 7.0, because it matches the application's target version. Always match the test framework with the underlying application framework to allow proper interop and keep consistency.
Now that we have a PaymentCalculator.UITest project in the tests folder, let's rename the autogenerated UnitTest1.cs file to UITests.cs. We also need to open the PaymentCalculator.UITest.csproj and change the TargetFramework from net7.0 to net7.0-windows, since our main project targets net7.0-windows.
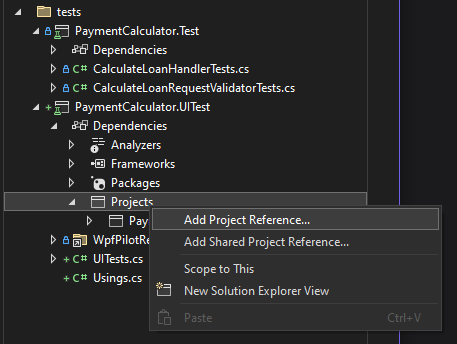
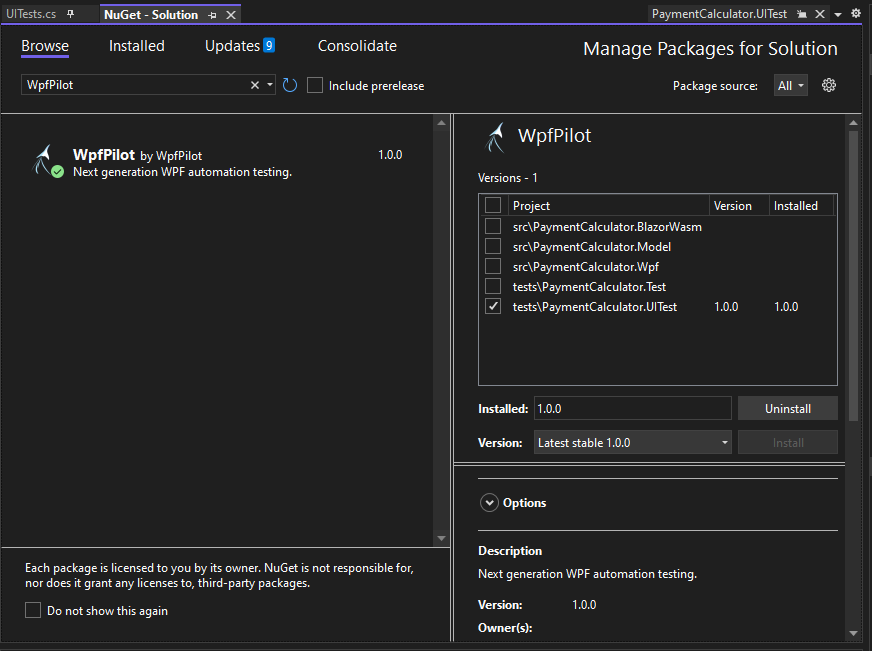
To complete the new project, we need to add a project reference to PaymentCalculator.Wpf and a package reference to WpfPilot.
To add a project reference, right click "Dependencies" under PaymentCalculator.UITest and then Add Project Reference….

To add a package reference, in the top nav bar select Tools > NuGet Package Manager > Manage NuGet Packages for Solution…. In the NuGet Package Manager UI, search for WpfPilot and add it to the PaymentCalculator.UITest project.

Now that everything is in place, we need to find some UI elements of interest to write a test around.
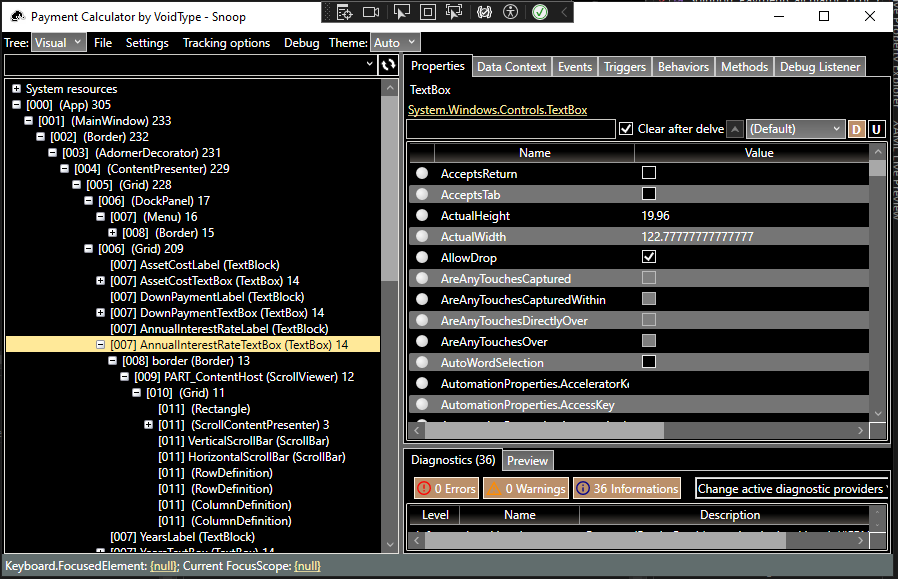
We could look at the xaml directly at PaymentCalculator.Wpf/MainWindow.xaml, but lets launch the app and use Snoop to find elements. Using Snoop is more standard in large enterprise applications that have thousands of WPF elements on the screen at once, across many views.
Launch the app using the standard F5 and inject Snoop.

In the left sidebar we can select elements and see them highlighted in the PaymentCalculator app. In the Properties tab, we can see the properties of the currently selected left sidebar element.
If we expand the visual tree down, we can see there is a Name next to many of the elements, for example AnnualInterestRateTextBox (TextBox) means it is a WPF TextBox with the property Name set to AnnualInterestRateTextBox. Some elements may not be named, and will only have the (TextBox) portion.
A useful Snoop hotkey is holding ctrl+shift while hovering over UI elements. Snoop will automatically show the hovered element in the visual tree and highlight it.
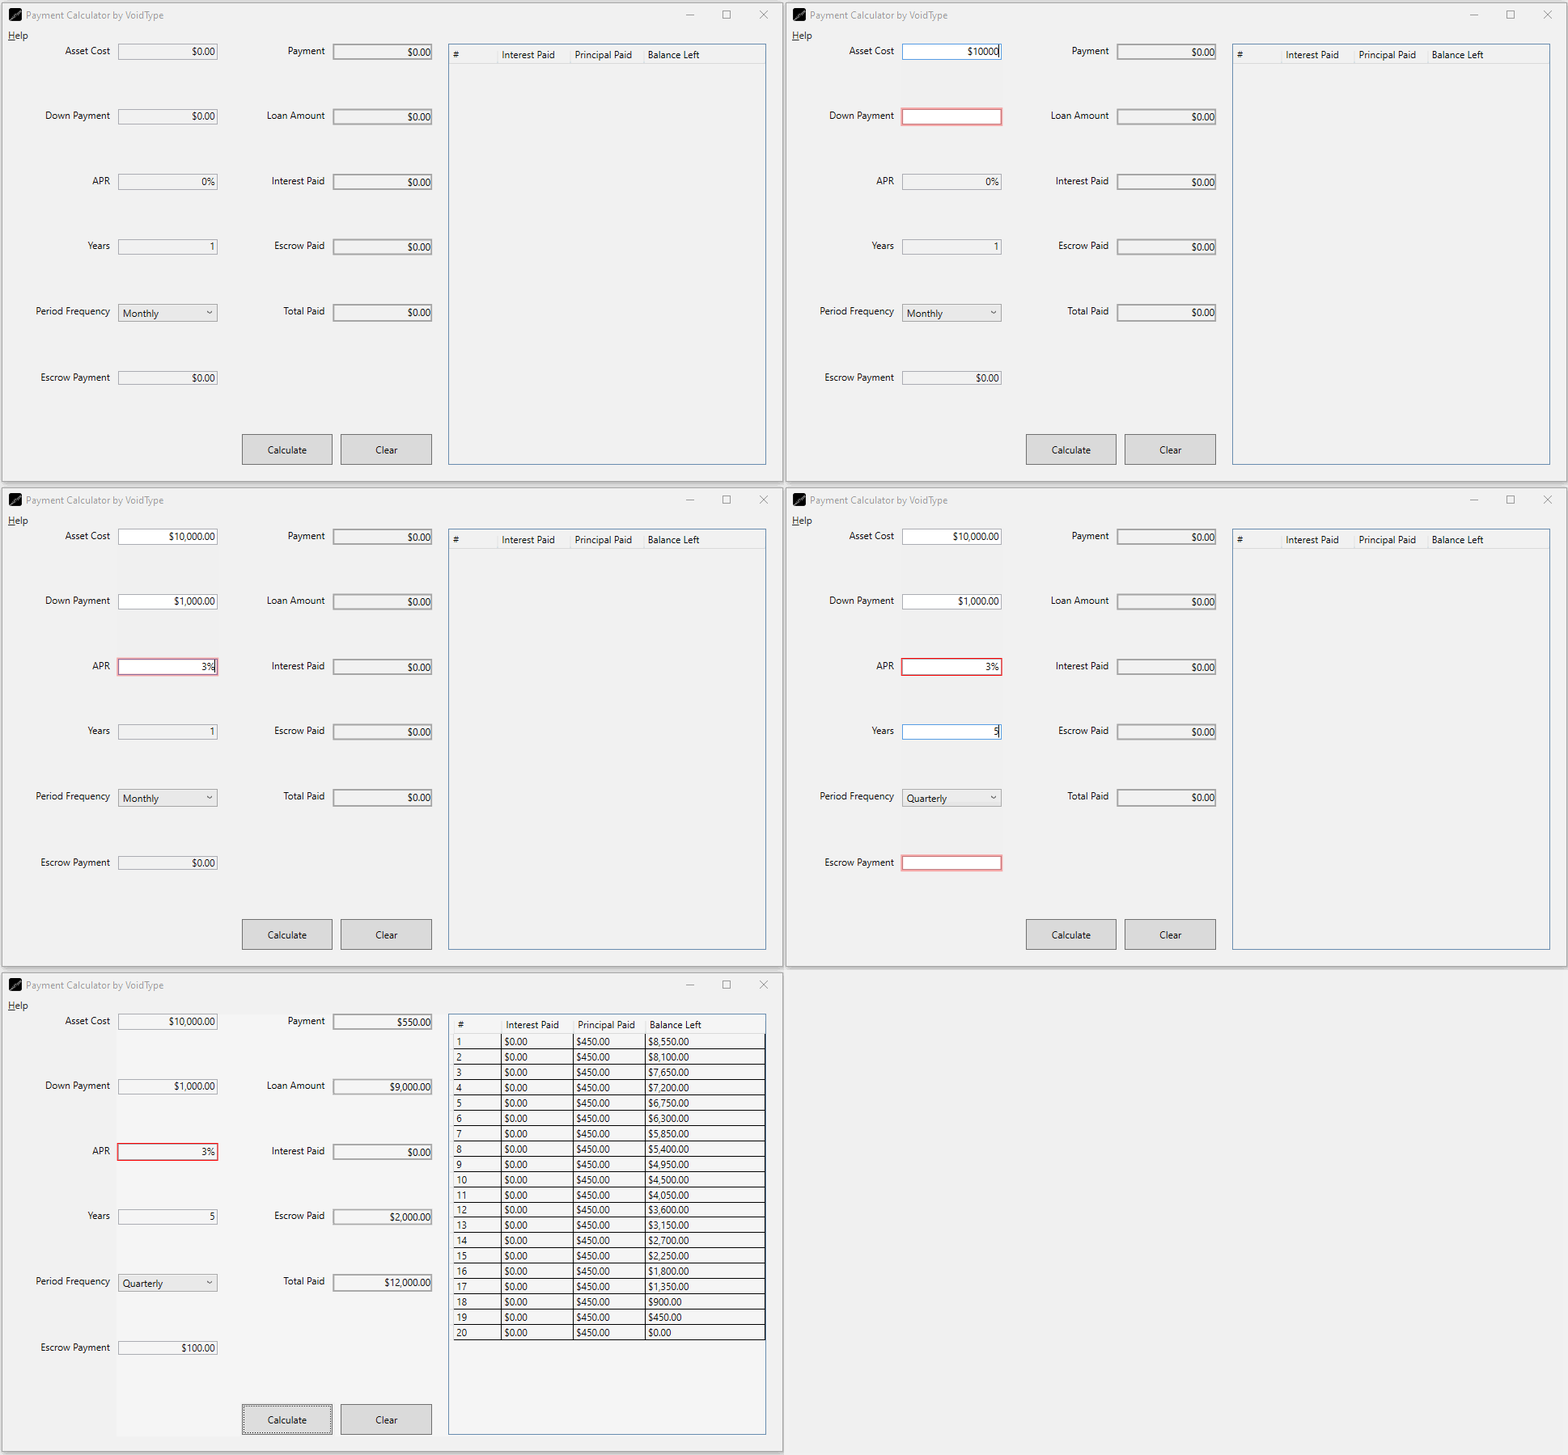
For our test, let's fill out the calculator inputs and click Calculate and then compare the result to a value we know is correct.
We note there is an:
- Asset cost field,
AssetCostTextBox - Down Payment field,
DownPaymentTextBox - APR field,
AnnualInterestRateTextBox - Years field,
YearsTextBox - Period Frequency dropdown,
PeriodsPerYearComboBox - Escrow Payment field,
EscrowPerPeriodTextBox - Calculate button,
CalcButton
We'll use these IDs in the test. Here's the test in full, we'll go over each part in detail.
[Fact]
public void HandlesNormalWorkflow()
{
    // Launch the `PaymentCalculator` app.
    // Make sure you built the app before running the tests.
    using var appDriver = AppDriver.Launch(@"..\..\..\..\..\src\PaymentCalculator.Wpf\bin\Debug\net7.0-windows\PaymentCalculator.exe");

    // Fill out the asset cost.
    appDriver.GetElement(x => x["Name"] == "AssetCostTextBox")
        .SetProperty("Text", "") // Clear the text box.
        .Type("$10000");

    // Fill out the down payment.
    appDriver.GetElement(x => x["Name"] == "DownPaymentTextBox")
        .SetProperty("Text", "")
        .Type("$1000");

    // Fill out the interest rate.
    appDriver.GetElement(x => x["Name"] == "AnnualInterestRateTextBox")
        .SetProperty("Text", "")
        .Type("3%");

    // Fill out the years.
    appDriver.GetElement(x => x["Name"] == "YearsTextBox")
        .SetProperty("Text", "")
        .Type("5");

    // Select a period frequency.
    appDriver.GetElement(x => x["Name"] == "PeriodsPerYearComboBox")
        .SetProperty("SelectedIndex", 1);

    // Fill out the escrow payment.
    appDriver.GetElement(x => x["Name"] == "EscrowPerPeriodTextBox")
        .SetProperty("Text", "")
        .Type("$100");

    // Calculate the result.
    appDriver.GetElement(x => x["Name"] == "CalcButton").Click();

    // Verify the results.
    var lastRowResult = appDriver.GetElement(x => x.TypeName == nameof(MainWindow))
        .Invoke<MainWindow, List<AmortizationPeriod>>(x => ((LoanViewModel) x.DataContext).Schedule.ToList())
        .Last();
    Assert.Equal(0.0m, lastRowResult.BalanceLeft);
    Assert.Equal(0.0m, lastRowResult.InterestPayment);
    Assert.Equal(20, lastRowResult.PeriodNumber);
    Assert.Equal(450.0m, lastRowResult.PrincipalPayment);
}
If we run the test, we see it clicks through various UI and the test passes.

Test Breakdown
- We setup the
AppDriverusing a relative path to the application exe. TheAppDriverisIDisposableso we useusing var. On dispose, theAppDriverwill close the app. Behind the scenes, theAppDriverinjects the automation code into the running app, allowing us to control it programmatically. - We select elements using
GetElement, in our code we stuck to using theName, but any criteria can be used. If we create a reference to an element, its properties will be automatically updated when the app is interacted with,var element = appDriver.GetElement(x => x["Text"] == "Unclicked Button");
element.Click();
// This will be true.
Assert.True(element["Text"] == "I was clicked"); - We manipulate elements using standard
Click,Type, andSetPropertymethods. These trigger events on the underlying element, or manipulate its properties directly. - Finally, we read the data model directly instead of doing it through UI properties and then run
Assertson the result. Because the data model is serializable, this is possible. WPF Pilot allows arbitrary code execution on WPF elements and the app itself, which is a powerful tool for testing.
The finished tutorial is available on the ui-tests branch.